Short Answer
In the realm of DIY projects and home improvement, one often encounters a plethora of components and accessories that contribute to a successful installation. Amongst these, the red wall plug holds a prominent place, particularly when interfacing with various materials and ensuring a steadfast grip. Yet, many find themselves puzzled by the technicalities surrounding the appropriate drill bit selection. This article aims to illuminate the intricate relationship between red wall plugs and drill sizes, fostering a newfound understanding that can transform your approach to drilling.
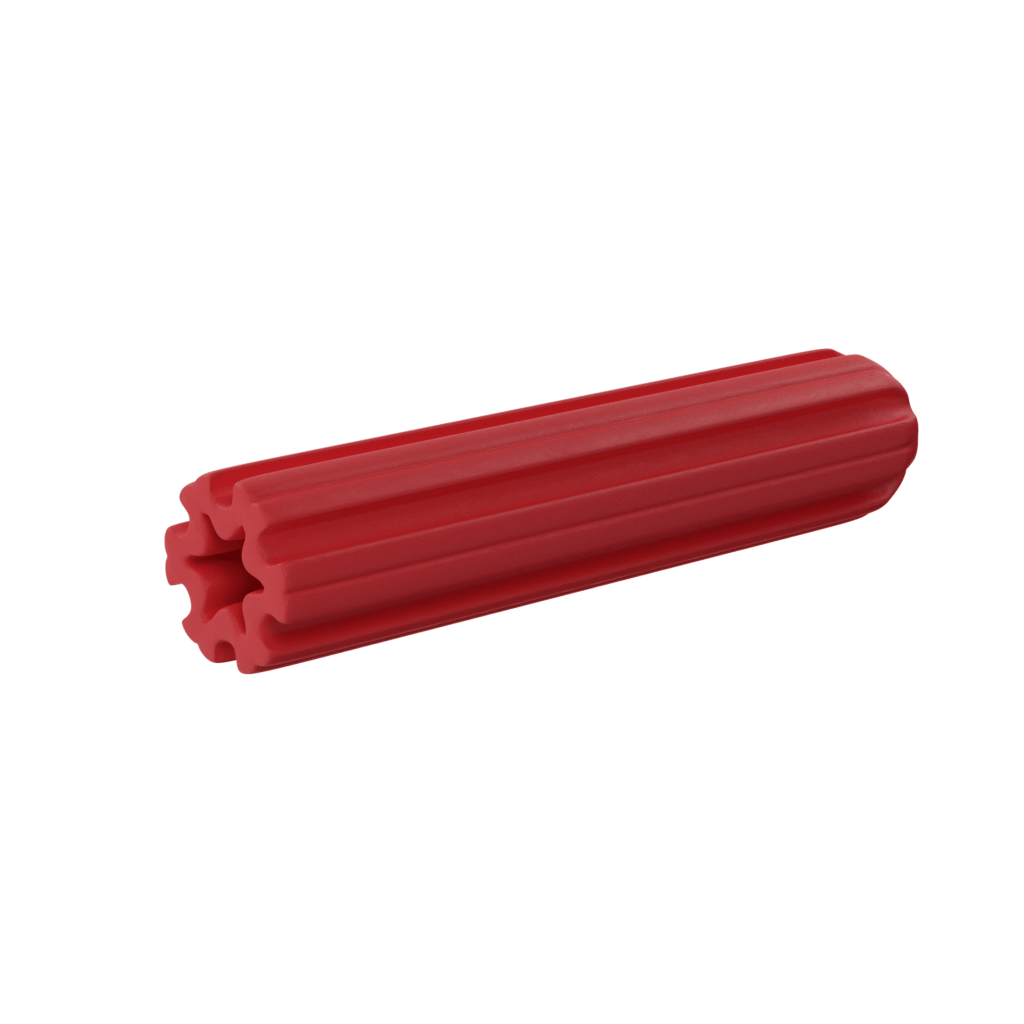
When embarking on a construction or renovation project, the choice of wall plug and the corresponding drill bit size are pivotal to achieving secure fittings. Wall plugs, typically made from durable plastic, serve as anchors for screws to fasten into walls, thereby providing a reliable grip. The red wall plug, in its essence, is specifically designed for 6mm drill sizes and is tailored to accommodate 8-gauge screws, ultimately offering robust support for various fixtures.
To fully comprehend the significance of selecting the right drill bit, it is crucial to delve into the anatomy of a wall plug. The red wall plug’s structure features fluted sides that allow for expansion within the wall material when a screw is inserted. This expansion increases the surface area of contact, thereby enhancing holding power. A drill bit that matches the diameter of the wall plug is vital; an inappropriate size can lead to compromised integrity, resulting in loose fittings or, worse, structural failure.
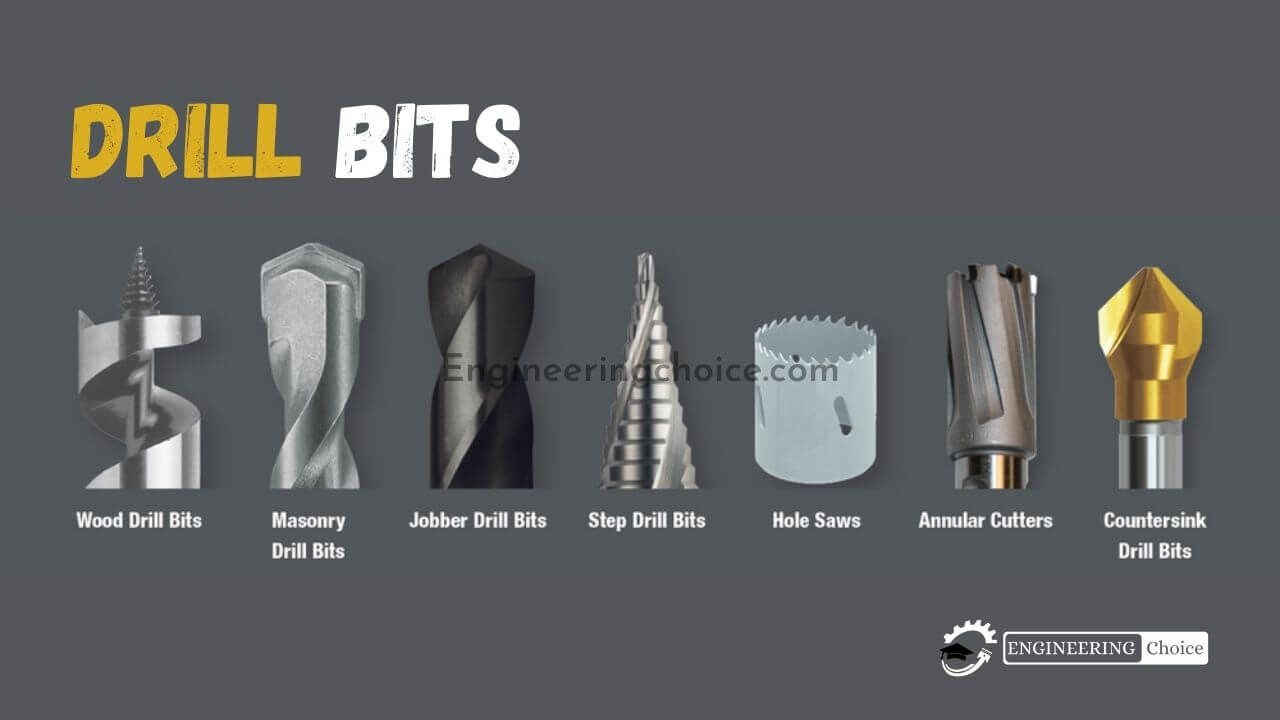
The journey of selecting the correct drill bit begins with understanding the specifications of your project. Prior to even purchasing materials, ask yourself: what type of wall will you be drilling into? The material can significantly influence the drill bit selection. For instance, if you’re working with masonry, a masonry bit with a carbide tip is advisable, while for drywall, a standard twist drill bit suffices. This initial evaluation ensures that the drilling experience is not only seamless but also executed with precision.
Once the wall material has been identified, one must consider the drill bit dimensions. The red wall plug in question necessitates a 6mm drill size. However, it is essential to note that drill bits may vary in design and manufacturing standards. Some bits may actually measure slightly over or under the stated size due to tolerances in production. This is where a meticulously calibrated measuring tool comes into play. Using a calliper or a drill bit gauge can provide an accurate measurement, ensuring that the bit aligns perfectly with the specifications of the red wall plug.
Another critical aspect is the drill’s RPM (revolutions per minute). The speed at which you drill can also impact the quality of the hole. For instance, drilling too harriedly into denser materials could lead to heat build-up, which can diminish the drill bit’s efficacy and potentially warp the wall plug during installation. Conversely, too slow of a speed may result in a frazzled end, preventing a clean extraction of material, and affecting the precision of your hole. Achieving the optimal balance in speed is essential for creating a hole that is both accurately sized and free from debris.
Moreover, the angle and pressure applied during drilling can significantly affect the outcome as well. Maintaining a steady, perpendicular stance to the wall allows for cleaner holes, minimising the risk of cracking or chipping the surrounding material. Additionally, employing a light, consistent pressure can promote a smoother drilling action, thereby prolonging the lifespan of your drill bit.
But what happens if you inadvertently select a drill bit that does not perfectly match the requirements? This often leads to what is commonly known as “oversizing” the hole. Larger openings can cause the red wall plug to have insufficient friction against the wall, leading to unstable fixtures. In such instances, it may be necessary to resort to a larger wall plug or employ specialized adhesive methods to ensure that the fixture remains secure. This contingency plan emphasises the importance of meticulous preparation during the initial stages of your project.
For those who wish to expand their knowledge further, it is worth considering advanced wall plug variations and their respective drill bit requirements. There are various types of wall plugs available—each designed for particular applications. For example, metal wall plugs might require different drill bit dimensions, and their application generally intensifies when working with heavier fixtures. Understanding these nuances not only broadens your technical repertoire but augments your capability to approach projects with confidence.
In conclusion, the journey of selecting the appropriate drill bit for installing red wall plugs is far from mundane; it is a venture steeped in learning and understanding. The interplay of wall materials, drill sizes, and installation techniques paints a vivid picture of the complexities involved in achieving secure fixings. As you embark on your next project, let this guide serve as a catalyst for curiosity, prompting you to explore the many dimensions of home improvement. By mastering the intricacies of drill bit selection and wall plug installation, one can elevate a simple task into a rewarding achievement, fostering both safety and satisfaction in every completed endeavour.
FAQ
What drill bit size should I use for a red wall plug?
Use a 6mm drill bit for the red wall plug to ensure a proper fit.
Why is it important to choose the right drill bit for wall plugs?
Choosing the right bit ensures the hole matches the plug diameter, preventing loose fittings or damage.
Can I use the same drill bit for different wall materials?
No, use a masonry bit for hard surfaces like brick and a standard twist bit for drywall.
What are the consequences of using an oversized drill bit?
Oversized holes reduce friction, causing the wall plug to become loose and fixtures to be unstable.
Leave a Reply