Short Answer
When it comes to home maintenance, ceramic tile repair can often feel like an overwhelming task. Have you ever gazed upon a cracked or chipped tile and felt a pang of despair? The sight of blemished surfaces can be disheartening, turning a once immaculate bathroom or kitchen into a source of frustration. However, what if you could tackle those imperfections with ease, transforming your worries into a job well done? A ceramic tile repair kit may just be the solution to your predicament, allowing you to mend those unsightly flaws like a seasoned professional, without the hassle of hiring an expert or parting with your hard-earned cash.
As you consider diving into the realm of DIY repair, let’s delve deeper into the various aspects of using a ceramic tile repair kit. From understanding the components of the kit to mastering the application process, you’ll discover that fixing those pesky cracks is not only achievable but also gratifying.
Understanding the Components of a Ceramic Tile Repair Kit
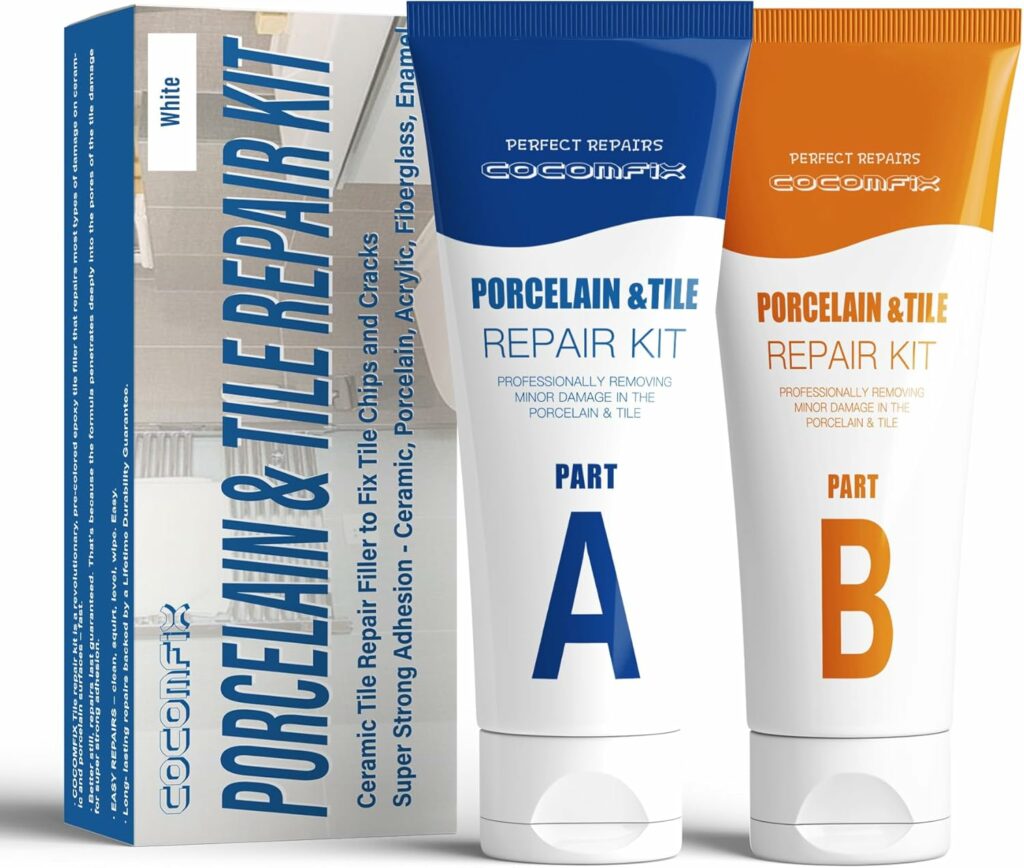
Before embarking on your repair adventure, familiarise yourself with the essential elements typically found in a ceramic tile repair kit. Each kit varies, but most include several fundamental components designed to facilitate a successful repair. Here’s what you can expect:
- Epoxy or resin compounds: These are the heart of the repair process, providing a robust bonding agent that fills in cracks and adheres to the tile surface.
- Colour matching pigments: Many kits offer a range of pigments to help you achieve a perfect match with your existing tile, ensuring a seamless repair that is virtually undetectable.
- Application tools: Typically, kits include a variety of applicators or spatulas, allowing for precision and control during the application of the repair compound.
- Instruction manual: A comprehensive guide is often provided, detailing step-by-step instructions on how to use the kit effectively.
By understanding these components, you will be better prepared to tackle your tile repair project with confidence.
Preparing for the Repair Process
The journey towards restoring your ceramic tiles begins well before the actual repair takes place. Preparation is critical in achieving a successful and aesthetically pleasing result. Here are the key steps you should follow:
- Assess the Damage: Carefully inspect the cracked tiles to determine the extent of the damage. Identifying whether it’s a surface crack or if the tile is deeply compromised will help you decide the best approach for repair.
- Clean the Area: Before applying any compound, ensure the tile surface is free from dirt, grease, and debris. A clean surface will allow better adhesion of the repair material.
- Gather Your Tools: Collect everything you’ll need, including your ceramic tile repair kit, a small brush for cleaning, and any additional tools necessary for the job.
Preparation laid the groundwork for a smooth repair process and sets the stage for a triumphant outcome.
Executing the Repair: Step-by-Step Guide
Now that you’re equipped with the right tools and preparation, it’s time to execute the repair. Follow this detailed guide to achieve professional results:
- Mix the Epoxy: Depending on the type of kit, you may need to mix the epoxy or resin with the provided hardener. Follow the instructions carefully; an improper mixture could compromise the integrity of your repair.
- Add Pigments: To achieve a colour match, add the required pigments to the mixed epoxy. Test a small amount on a hidden area of the tile to ensure the colour is satisfactory before full application.
- Apply the Compound: Using the applicator tool, carefully apply the epoxy to the damaged area. Ensure the compound fills the crack completely without overflow.
- Smooth the Surface: With a clean spatula or fingertip, smooth out the surface of the repair. This step is crucial in achieving a seamless look and ensuring the repair adheres well.
- Allow to Cure: Follow the recommended drying times indicated in the kit’s instructions. Do not rush this process; allowing the compound to cure properly is vital for a strong repair.
Success at each stage will not only repair your tiles but also restore your confidence in your DIY capabilities.
Finishing Touches and Maintenance
After the repair has fully cured, it’s time for the finishing touches. Inspect the area to ensure a smooth, even surface. If any additional sanding or smoothing is necessary, now is the time to do it. Once satisfied, clean the surrounding tiles and consider applying a sealant for added protection against future damage.
Routine maintenance is also essential in prolonging the life of your repaired tiles. Regular cleaning and the occasional reapplication of sealant can help preserve their integrity, keeping your surfaces looking pristine for years to come.
The Benefits of Using a Ceramic Tile Repair Kit
The allure of a ceramic tile repair kit lies in its myriad benefits. Not only do these kits save time and money, but they empower homeowners to take control over their own repair needs. Moreover, successfully completing a repair task can bolster your self-esteem and encourage further DIY endeavours. It’s a win-win situation that allows you to keep your home in immaculate condition while cultivating a sense of accomplishment.
In conclusion, the challenges associated with ceramic tile repair don’t have to be daunting. Armed with the right information and tools, you can confidently address those pesky cracks and chips, restoring your tiles to their former glory. With each successful repair, you’ll discover the satisfaction that comes from DIY projects and perhaps even take on new challenges in maintaining your home.
FAQ
What is included in a ceramic tile repair kit?
A ceramic tile repair kit typically includes epoxy or resin compounds, colour matching pigments, application tools, and an instruction manual.
How do I prepare for ceramic tile repair?
Preparation involves assessing the damage, cleaning the area, and gathering tools necessary for the repair.
What are the benefits of using a ceramic tile repair kit?
These kits save time and money, empower homeowners to tackle repairs themselves, and provide a sense of accomplishment.


Leave a Reply