Short Answer
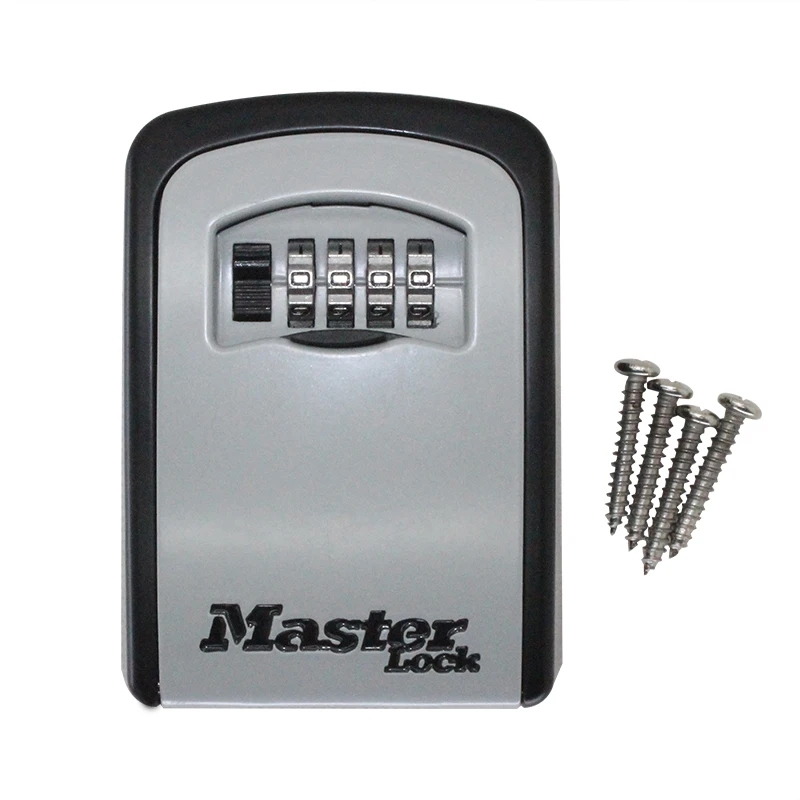
In an increasingly security-conscious world, the importance of ensuring your key safe is adequately protected cannot be overstated. A key safe offers a practical solution for safeguarding spare keys, allowing trusted individuals easy access. However, the efficacy of this storage system hinges significantly on the robustness of its code. Thus, mastering the art of changing the code on your key safe is not merely a mundane task; it is a vital measure in fortifying your personal security. This comprehensive guide is designed to immerse you in the intricate process of altering the combination on your key safe, offering detailed, step-by-step instructions that promise to transform your understanding of this essential skill.
Before delving into the specifics, it’s crucial to recognise that the design and mechanism of key safes vary. Understanding your particular model is fundamental to a successful code change. Whether it’s a simple push-button mechanism or a more sophisticated digital interface, familiarising yourself with the nuances of your device will streamline the process and ensure you don’t encounter unnecessary obstacles.
Step 1: Gather Your Tools
Before embarking on your task, ensure you have the necessary tools at hand. A small flat-head screwdriver is often indispensable for accessing the internal workings of your key safe. Additionally, a flashlight can be useful for inspection, especially if you are working in a dimly-lit environment. As you prepare, make certain you have your current access code readily available, as you will need it to initiate the change. This initial preparation sets a solid foundation for the task ahead, eliminating unnecessary delays.
Step 2: Open Your Key Safe
With your tools in hand, the next logical step is to open your key safe. Input your current access code with precision. For push-button models, press the appropriate buttons in sequence, ensuring that you hear a click confirming the mechanism has disengaged. If your key safe is digital, enter the code using the keypad, paying close attention to the display to verify successful input. Once the safe is open, take a moment to inspect the interior; this is an opportune time to check for any wear or damage that could compromise its integrity.
Step 3: Locate the Code Change Mechanism
Once inside, your focus should shift to locating the code change mechanism. In many key safes, this can be achieved by identifying a small lever or button inside the compartment. Some models require the removal of a cover panel, which may be secured by screws. Here, your screwdriver will come into play. Gently remove any screws and reveal the inner workings of the device. This step can incite a sense of intrigue as you explore the intricate mechanics that uphold your security.
Step 4: Resetting the Code
Having accessed the changing mechanism, the next phase calls for you to input your new code. Most key safes support a combination of four or more digits. Select a code that strikes a balance between memorability and security. It’s advisable to avoid straightforward combinations like ‘1234’ or birth dates, as these are predictable and can be easily guessed. Instead, consider using a random sequence or a meaningful number that is less obvious to others. Engage the reset mechanism — this process can vary significantly between models. Refer to your user manual for specific instructions. The intrigue of resetting a code brings with it a sense of accomplishment as you take proactive steps towards enhancing your security.
Step 5: Test Your New Code
Once you have successfully input and saved your new code, it is critical to test it before closing your key safe. Close the safe door, ensuring it is properly secured, and then attempt to open it using the freshly selected combination. This trial is essential, serving not only as a confirmation of your efforts but as a precaution against potential mishaps. Should the door open seamlessly, take a moment to revel in the satisfaction of your accomplishment. However, if the door does not respond, you may need to revisit the code reset process or consult the user manual for troubleshooting steps.
Step 6: Finalise and Document the Change
With the testing complete and your new code verified, you are now poised to finalise the process. Close the key safe, ensuring it securely locks. Keeping a record of your new code in a safe yet accessible location is paramount. Avoid storing it in obvious places; consider utilizing a personal code journal or a password manager for optimal discretion. This concluding step ensures that all your efforts do not go to waste, providing you with the peace of mind that accompanies a well-secured entryway.
Conclusion
Changing the code on a key safe is an exercise rich with importance, extending beyond mere functionality into the realm of personal security. By mastering this process, you transform the perception of your key safe from a simple storage solution into a sophisticated barrier guarding against potential intrusion. Through a comprehensive understanding of the mechanics involved, alongside a meticulous approach to code alteration, you not only protect your property but also empower yourself with knowledge. The expertise gained through this process equips you for future challenges, assuring that your key safe remains a steadfast ally in your quest for security.
FAQ
How do I know if my key safe is push-button or digital?
Check the exterior of your key safe: push-button models have physical buttons, while digital safes feature an electronic keypad and display.
Can I change the code without opening the safe?
Generally, you need to open the safe first to access the internal reset mechanism, but consult your user manual as some models may differ.
What if the new code doesn’t work after resetting?
Double-check the reset steps and ensure you fully engaged the reset mechanism. If issues persist, refer to the user manual or contact support.


Leave a Reply