Short Answer
When it comes to enhancing bicycle performance, enthusiasts often ponder the essential components that can elevate their ride. Ever thought about your bottom bracket? It might not be the most glamorous part of your bike, but choosing the right one can significantly impact your cycling experience. Enter the sealed square taper bottom bracket. What exactly is this floral gem of engineering, and why should you consider it for your next upgrade? Let’s delve into the myriad benefits and installation intricacies of this crucial bike component.
Understanding the Sealed Square Taper Bottom Bracket
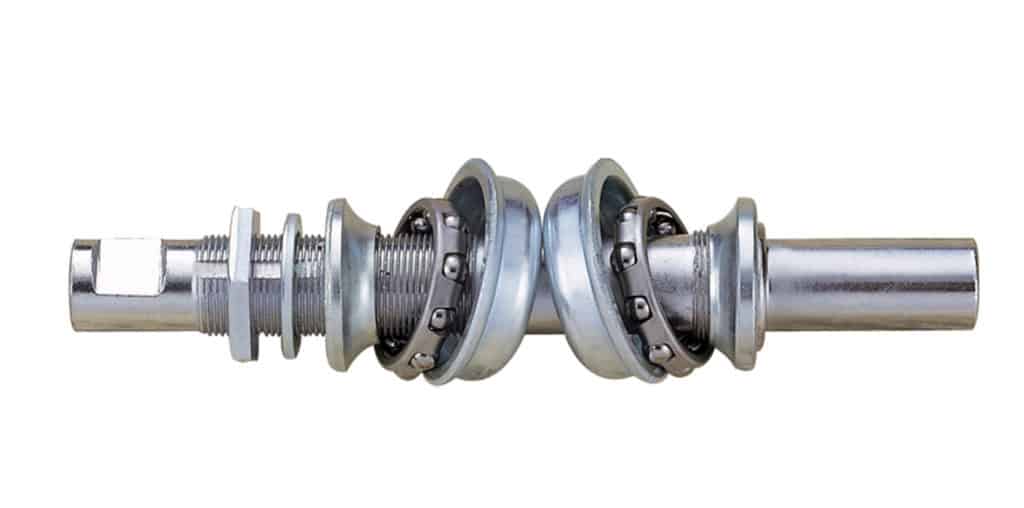
The bottom bracket serves as the connection point between your bike’s frame and its crankset. It houses bearings that enable the smooth rotation of your pedals. A sealed square taper bottom bracket, as the name suggests, uses a square-shaped spindle, ensuring a secure yet straightforward connection to the crank arms. The sealed aspect comes into play by protecting the bearings from dust, moisture, and other gritty adversaries.
Benefits of a Sealed Square Taper Bottom Bracket
1. Enhanced Durability
One of the primary advantages of a sealed bottom bracket is its remarkable durability. The seals prevent grime, water, and grit from entering the bearings, which ultimately extends their lifespan. This feature is particularly beneficial for cyclists who ride in varied weather conditions or traverse off-road terrains where exposure to the elements is rampant.
2. Reduced Maintenance
Imagine cycling without the incessant worry of constant maintenance. Sealed bottom brackets are designed to limit the need for frequent lubrication or bearing adjustments. This convenience allows riders to spend more time on the trails and less in the workshop, creating a more enjoyable cycling experience.
3. Smoother Pedaling
The fluid motion offered by a quality sealed bottom bracket can dramatically enhance your pedaling efficiency. When the bearings are protected from contamination, they maintain a level of smoothness that translates into better power transfer, letting you push harder without expending excessive energy. Your rides will feel more fluid and less laborious.
4. Compatibility with Various Cranksets
For those who delight in customising their bikes, a sealed square taper bottom bracket offers compatibility with a wide range of cranksets. This flexibility allows cyclists to mix and match components to achieve their desired aesthetic and performance standards without requiring a complete overhaul.
5. Value for Money
Budget-conscious cyclists rejoice! Sealed square taper bottom brackets often come at a competitive price point compared to other bottom bracket types. Considering their durability and reduced maintenance, they offer excellent value for money, making them an attractive choice for both casual riders and cycling aficionados alike.
Challenges to Consider
While sealed square taper bottom brackets come with remarkable advantages, they are not without their challenges. The installation can present a learning curve for those unaccustomed to bicycle mechanics. Additionally, some argue that certain high-performance systems offer smoother pedalling experiences, but they often come at a steeper price. Balancing performance, price, and user preference is key.
Installation Guide for Sealed Square Taper Bottom Bracket
Now that the benefits are clear, how do you go about installing this formidable component? It might seem daunting at first, but fear not! Follow this step-by-step guide, and you’ll be well on your way to a seamless installation.
Tools You’ll Need:
- Bottom bracket tool
- Socket wrench
- Grease
- Torque wrench (optional but recommended)
- Clean cloth
Step 1: Prepare Your Workspace
Begin by ensuring your bicycle is securely positioned on a work stand or upside down. This stability will allow you to work efficiently. Workshop cleanliness can also prevent unwanted debris from contaminating your components.
Step 2: Remove the Old Bottom Bracket
Using the bottom bracket tool, carefully unscrew the existing bottom bracket from the frame. Depending on the model, this may require some force. Be cautious not to damage the threads within the frame.
Step 3: Clean the Interface
Once the old bottom bracket is removed, thoroughly clean the shell with a clean cloth to remove any residue or old grease. Ensuring this area is pristine helps the new component seat properly.
Step 4: Apply Grease
Generously apply grease to the threads of the new sealed square taper bottom bracket. This lubrication will facilitate a seamless installation and help protect against corrosion.
Step 5: Install the New Bottom Bracket
Insert the new bottom bracket into the frame and tighten it using the bottom bracket tool. Ensure it is secure but avoid over-tightening, which could damage the threads.
Step 6: Reattach the Crankset
With the bottom bracket securely installed, it’s time to attach the crankset. Align the square taper ends with the spindle and firmly press them onto the new bottom bracket. Fasten the crank arms in place, ensuring they are secure.
Final Checks
Perform a few test spins to ensure everything operates smoothly. Listen for any unusual sounds and check for any play in the crankset. If all feels right, you’re ready to hit the road!
Conclusion
In conclusion, the sealed square taper bottom bracket is a superb investment for those looking to enhance their cycling experience. With its myriad benefits—from durability and reduced maintenance to compatibility and value for money—it is a wisely considered upgrade. While installation may pose a challenge, armed with the right tools and knowledge, you can confidently undertake this project yourself. So, saddle up and enjoy the journey, knowing your bike is optimised for performance!
FAQ
What is a sealed square taper bottom bracket?
It is a bicycle component that connects the crankset to the frame, featuring a square spindle and sealed bearings to protect against dirt and moisture.
How does a sealed bottom bracket benefit cyclists?
It increases durability, reduces maintenance needs, and provides smoother pedaling for a better cycling experience.
Can I install a sealed square taper bottom bracket myself?
Yes, with the right tools and careful attention to instructions, installation is possible for enthusiasts with some mechanical skill.
Are sealed square taper bottom brackets compatible with all cranksets?
They are compatible with many cranksets that use square taper spindles but not all modern cranksets that require different interfaces.


Leave a Reply