Short Answer
So, you’ve decided to enhance your outdoor space and create a beautiful patio by laying paving slabs on soil. But, have you ever wondered just how much effort it takes to achieve that perfect finish? The process may seem daunting at first, but fear not! With careful planning and execution, you can transform your garden into a picturesque retreat. This DIY guide will walk you through the steps necessary to create a stunning patio, ensuring that every detail is meticulously covered.
Before embarking on this project, it’s essential to consider the potential challenges. For instance, how do you ensure that your slabs are level and stable over time? Managing drainage is another critical concern. Let’s delve into the details, exploring each step to prevent any hiccups along the way.
Step 1: Planning Your Patio Layout
Before you break ground, take time to plan your patio’s design. Measure the area where you intend to lay the slabs, using string lines to outline the shape. Consider how you want the space to function. Will it be for entertaining guests, sunbathing, or perhaps a tranquil spot for relaxation? Visualising this will help you determine the size and shape of your patio.
In addition to aesthetics, think practically about accessibility and orientation. What direction does the sun travel? Do you require shade or wind protection? Once you’ve settled on your layout, note the measurements for the next phase.
Step 2: Gathering Materials and Tools
Every successful project begins with the right tools. Before you begin digging, gather everything you’ll need. Typical materials include:
- Paving slabs (of your choice)
- Sharp sand
- Compacted gravel or crushed stone (for base material)
- Edging stones (if desired)
- Garden spade
- Rubber mallet
- Level
- Measuring tape
- String and stakes or pegs
- Optional: landscape fabric to prevent weed growth
Once your tools are at the ready, you can proceed to clear the area where your patio will be laid.
Step 3: Preparing the Ground
Start with removing the grass, weeds, and any existing debris from the patio area. You’ll want to dig down to a depth of at least 100 to 150 mm (4 to 6 inches). This depth will accommodate both the base layer and the sand. Make sure to excavate an area slightly larger than your intended patio dimensions to allow for adjustments.
As you dig, maintain a slight slope away from your home to facilitate drainage. A gradient of approximately 1:100 is ideal. Before moving on, compact the soil gently to create a solid foundation. A whacker plate or manual tamper can be used for this task, ensuring stability for the new slabs.
Step 4: Adding the Base Material
The next step involves laying down a solid base. Begin by pouring a layer of compacted gravel or crushed stone into the excavated area. This layer should be about 50 to 75 mm (2 to 3 inches) thick. Use a rake to level the surface, then compact it again for a firm foundation. It’s crucial to have a well-compacted base to prevent future sinking or shifting of the slabs.
If you’ve opted for landscape fabric to thwart weed growth, now is the time to lay it over the compacted base. This will help keep your patio looking pristine for years to come.
Step 5: Laying the Sand Bed
In this step, you’ll install a layer of sharp sand approximately 30 to 50 mm (1 to 2 inches) thick above the gravel base. Use a screed board or a straight edge to achieve a smooth and level surface. The sand layer is vital as it allows for adjustments when laying the slabs, ensuring you achieve maintainable levels across the entire patio surface.
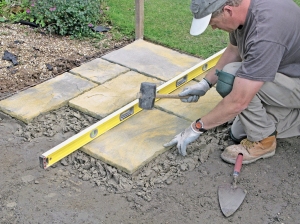
Step 6: Arranging the Paving Slabs
With your base set, you can now begin placing the paving slabs on the sand bed. Start from the corner or edge of your designated area, pressing them gently into the sand. Ensure that you leave a small gap between each slab for jointing material, typically around 5 to 10 mm (0.2 to 0.4 inches).
To achieve a level finish, frequently check with a spirit level. If any slabs are slightly higher than the others, a firm tap with a rubber mallet can adjust their height. This precision will help stave off wobbly pavers that may become a nuisance over time.
Step 7: Jointing the Slabs
Once all slabs are in position, it’s time to fill the joints. You can use jointing sand, polymeric sand or even a cement mixture for this purpose. Gently sweep the chosen material into the gaps, making sure to thoroughly fill each joint. This not only provides a visually appealing finish but also helps hold the slabs securely in place, preventing weed growth and stabilising the paving.
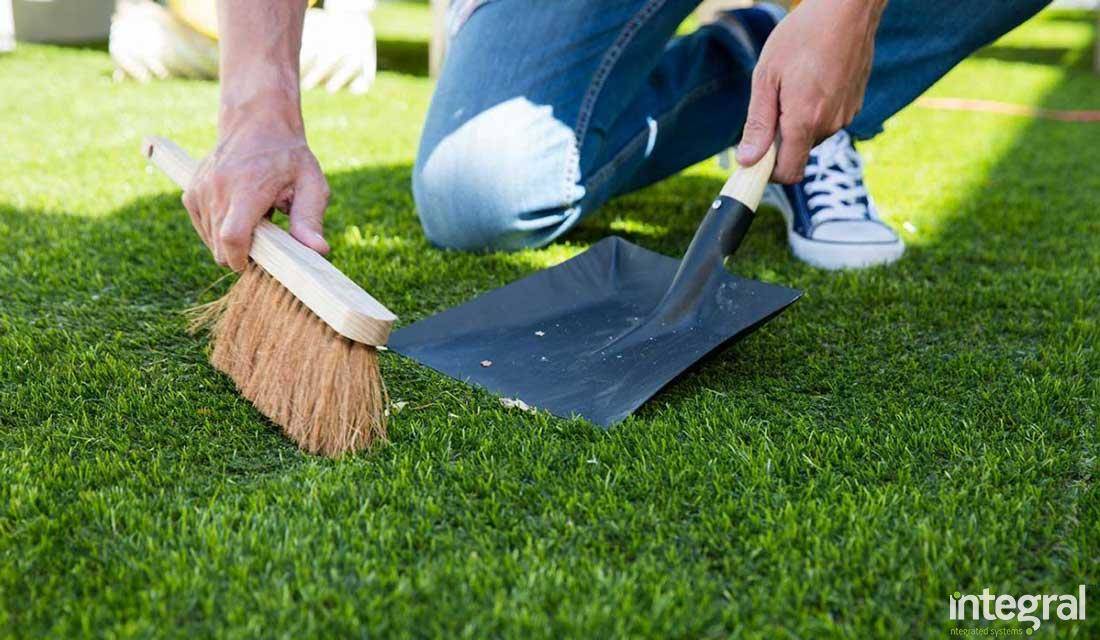
Step 8: Compaction and Cleaning
The final step is to give your new patio a thorough compaction. Place a piece of plywood on top of any newly laid slabs to avoid damaging the surface. Use your whacker plate to compress the slabs, ensuring that they settle firmly into the sand bed. Following compaction, it’s wise to sweep away any excess sand from the surface of the slabs, revealing your beautiful new patio without debris.
Lastly, take a moment to admire your handiwork. Picture yourself sipping on a refreshing drink while basking in the sun, or hosting lively gatherings with friends and family. The effort you’ve put into laying paving slabs properly will undoubtedly pay off. Are you ready to start this gratifying project and create your very own outdoor oasis?


Leave a Reply