Short Answer
Maintaining a leak-free shower is essential for preserving your bathroom’s integrity, and one crucial component that often goes overlooked is the seal at the bottom of your shower door. Over time, these seals can wear out, leading to unsightly water leaks and potential long-term damage. This comprehensive guide delves into the intricacies of shower door seals, focusing on their replacement and effective leak-fixing strategies to ensure a safe and functional shower environment.
Understanding Shower Door Seals
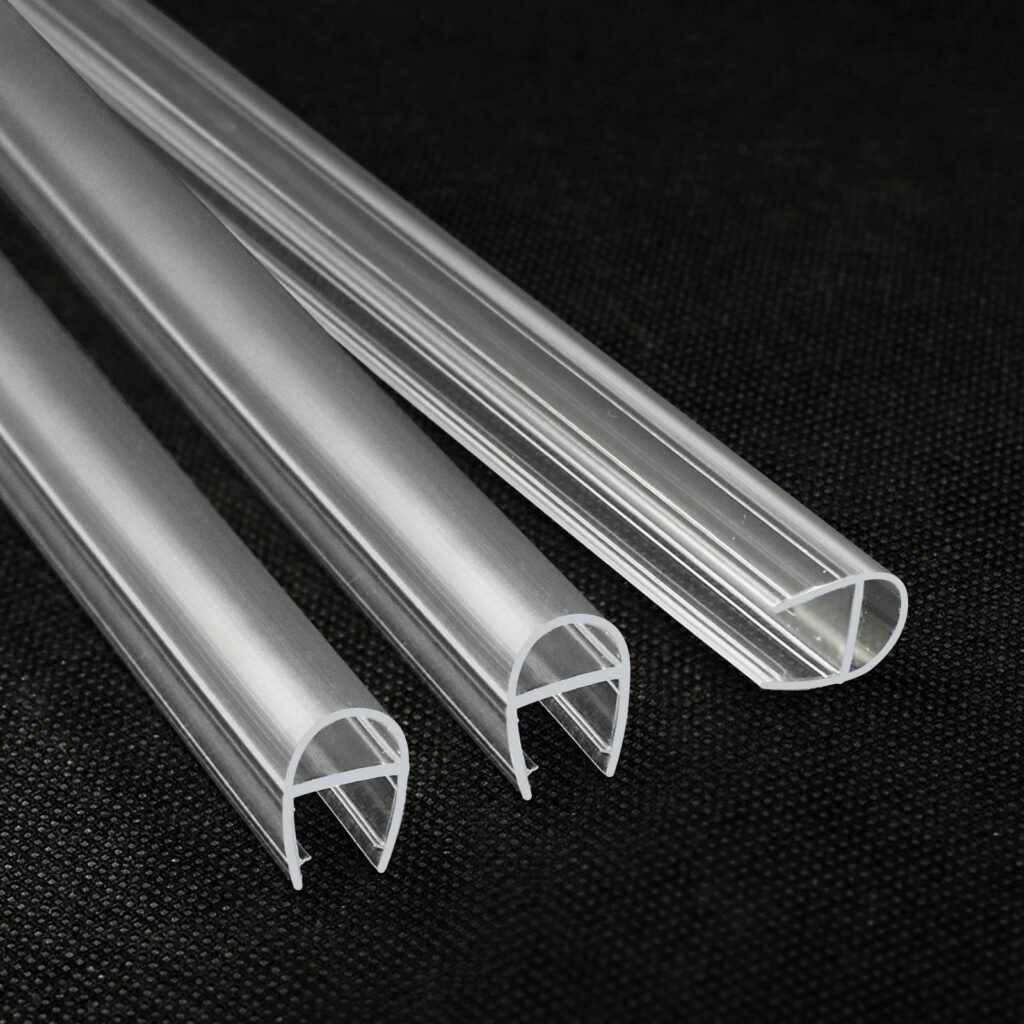
Shower door seals are designed to provide a watertight barrier that prevents water from leaking outside the shower enclosure. Typically made from materials such as vinyl or silicone, these seals can be found in various profiles, including U-shaped, T-shaped, or L-shaped designs, each tailored to fit specific door types. It is paramount to select the right seal for your shower door model to ensure optimal performance.
Common Issues with Shower Door Seals
As with any component subjected to daily use, shower door seals have a finite lifespan. Some of the common issues associated with worn-out seals include:
- Cracking and Splitting: Over time, exposure to moisture and temperature fluctuations can cause seals to crack, resulting in leaks.
- Mould and Mildew: Seals that remain damp for extended periods can become a breeding ground for mould and mildew, posing health risks.
- Loss of Flexibility: As seals age, they may lose their elasticity, failing to create an effective barrier against water.
- Accumulation of Debris: Dirt and soap residue can build up along the edges, preventing a snug fit and leading to leaks.
Identifying When to Replace a Seal
Recognising the signs that a shower door seal needs replacing is crucial for maintaining an efficient and clean shower environment. Regular inspection should be part of your bathroom maintenance routine. If you notice any of the following indicators, it may be time for a replacement:
- Visible cracks or tears in the material.
- Wet spots or puddles forming outside the shower enclosure.
- A persistent musty odour emanating from the shower area.
- Moisture accumulation on the exterior of the glass door.
Choosing the Right Replacement Seal
Selection of the correct replacement seal is critical. This process begins with understanding the different types of seals available. Some key considerations include:
- Material: Silicone seals promise durability and flexibility, while vinyl offers an economical option but may have a shorter lifespan.
- Profile Shape: Ensure the profile of the selected seal matches your shower door’s design for optimal sealing.
- Length and Width: Measure accurately to prevent purchasing a seal that is either too long or too short, as a poor fit can exacerbate leakage issues.
Tools Required for Replacement
Replacing a shower door seal is a manageable DIY task that requires minimal tools. Here’s what you’ll need:
- Utility knife or scissors for trimming the new seal.
- Adhesive or double-sided tape, if required for installation.
- Clean rags or sponges for cleaning the area before installation.
- Measuring tape to ensure that the correct length is cut.
- Gloves to protect your hands during the process.
Step-by-Step Replacement Guide
Once you have gathered your materials, follow these detailed steps to replace the shower door seal:
- Remove the Old Seal: Carefully pull away the old seal from the shower door. Use a utility knife to cut the adhesive if necessary.
- Clean the Area: Thoroughly clean the edge of the shower door where the seal was attached. Remove any dusty residue or mould with a gentle cleaner.
- Measure and Cut the New Seal: Measure the length required for your shower door and cut the new seal to size, ensuring clean, straight edges.
- Apply Adhesive: If your new seal requires adhesive, apply it evenly along the length of the seal. For seals with a built-in adhesive strip, peel away the backing carefully.
- Install the New Seal: Align the new seal with the edge of the door and press it firmly into place. Ensure a snug fit to prevent any leakage.
- Inspect the Installation: Once the seal is in place, inspect for any gaps or improper alignment. Adjust if necessary to ensure complete coverage.
Post-Replacement Maintenance
Once the new seal has been installed, proper maintenance is vital for its longevity. Regularly inspect the seal for signs of wear and maintain a clean environment to prevent mould growth. Consider implementing the following tips:
- Wipe down the seal after each shower to remove excess moisture.
- Avoid harsh chemicals that might degrade the seal material.
- Schedule routine inspections every few months to catch any issues early.
Conclusion
In conclusion, a well-functioning shower door seal is essential for maintaining the efficacy of your bathroom and preventing water damage. By understanding the types of seals, recognising when to replace them, and following a straightforward installation process, you can ensure your shower remains a pristine and safe space. With a little diligence and care, you can enjoy a leak-free shower experience for years to come.
FAQ
How often should I replace the shower door seal?
It is advisable to inspect the shower door seal every few months for wear and replace it when signs of damage such as cracks or leaks appear.
What materials are shower door seals made from?
Shower door seals are typically made from vinyl or silicone, each offering different durability and flexibility.
Can I replace the shower door seal myself?
Yes, replacing a shower door seal is a manageable DIY task that requires minimal tools and can be done by following a step-by-step guide.
Leave a Reply