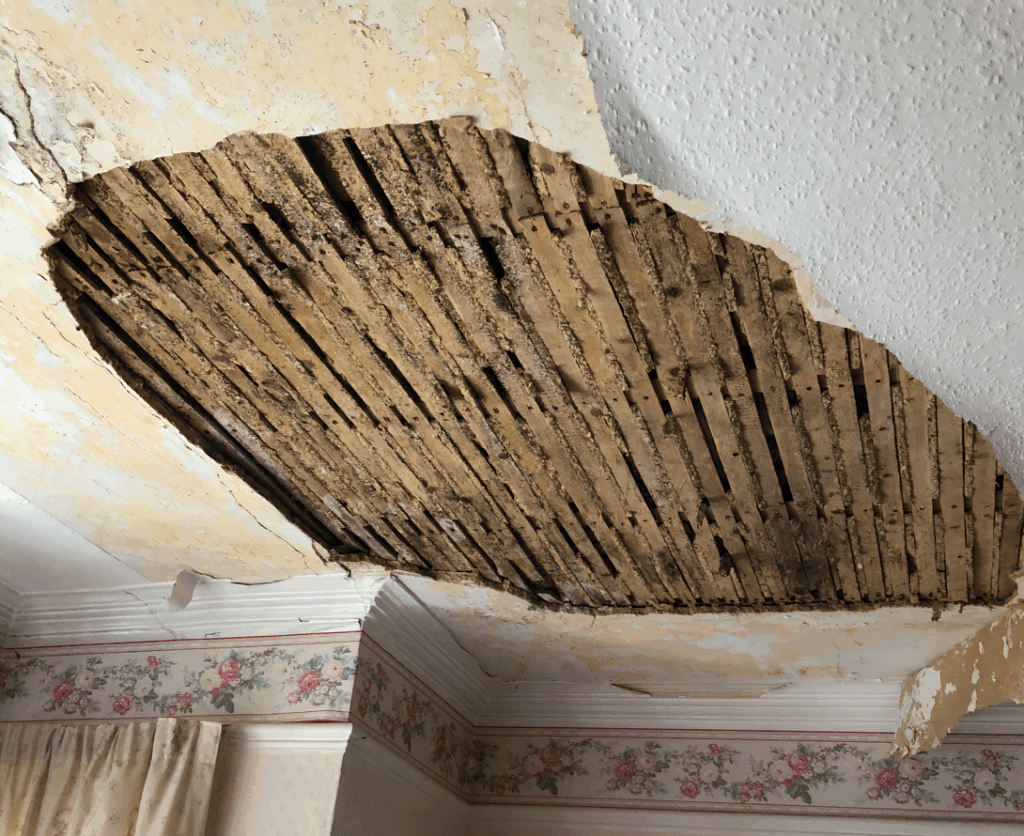
Short Answer
The question of whether you can plaster over wood is one that resonates with many DIY enthusiasts and professionals alike. As renovations become increasingly commonplace, knowing the best techniques to create a flawless finish becomes essential. This guide delves into the intricacies of plastering over wood, ensuring you’re well-equipped for your project.
Before embarking on this journey, it’s crucial to grasp the nature of both plaster and wood. Plaster is a malleable substance primarily made up of gypsum, which, upon drying, forms a firm and resilient structure. Conversely, wood, with its organic properties, expands and contracts, influenced by fluctuating humidity and temperature levels. Thus, considerations must be taken into account to meld these two disparate materials harmoniously.
Understanding the Requirements
Plastering over wood necessitates a thorough understanding of the necessary prerequisites. Begin by scrutinising the existing wooden surface. The wood must be clean, free of dirt, oil, or any form of contamination that could undermine adhesion. A gentle wash with soapy water can remove any surface grime; however, ensure that it dries thoroughly before proceeding.
It’s equally important that the wooden surface is structurally sound. If the wood presents signs of rot or damage, repairs should occur beforehand. A solid foundation is paramount; otherwise, your plaster could crack or peel, leading to premature deterioration.
Preparation is Key
Preparation does not merely begin and end with cleaning. The next step involves creating a suitable substrate for plaster application. This phase is often overlooked, yet it is primarily responsible for the durability and integrity of the plaster. Here’s how to prepare effectively:
- Apply a Primer: Utilising an appropriate primer specifically designed for wood surfaces is fundamental. This layer acts not only as a barrier but also enhances adhesion for subsequent layers of plaster.
- Use a Scratch Coat: A scratch coat, typically composed of a cement-based plaster or render, acts as a bridge between the wood and the final layer of plaster. This rough texture improves grip, allowing the plaster to latch on more effectively.
- Ensure Proper Drying: After applying the scratch coat, it’s crucial to allow adequate drying time. Depending on ambient conditions, this can take anywhere from a few hours to over a day. Rushing this stage can lead to complications down the line.
The Plastering Process
With a prepared surface, the actual plaster application can commence. It’s here that technique comes into play, shaping the success of your endeavour:
- Select the Right Plaster: Choosing a lightweight plaster mix is advisable, especially for overhead applications. This type stands resilient against cracks and reduces overall weight on your wooden substrate.
- Technique Matters: Employing the right technique is essential for achieving a seamless finish. Use a trowel at 45-degree angles to smooth the plaster over the scratch coat. This angle allows for even application and minimises the risk of air bubbles forming.
- Build Up Layers: Instead of applying a generous amount of plaster in one go, consider building up multiple thinner layers. Each layer should dry completely before the next is applied, ensuring enhanced longevity and a polished appearance.
Finishing Touches
Once the desired thickness is achieved, the finishing touches can elevate your project to the next level. This entails smoothing and polishing the surface, which can be accomplished using a wooden float or sponge in a method known as ‘sponging off’. The result is a strikingly sleek and professional appearance.
Maintenance and Care
After achieving a flawless finish, the question of maintenance arises. Plaster over wood can be more sensitive to climatic changes, thus necessitating vigilant monitoring. Humidity, in particular, can lead to issues like cracking or even damp. Here are recommendations to ensure your plastered surface stands the test of time:
- Monitor Humidity Levels: Keeping humidity within reasonable levels can mitigate the risks of expansion and contraction in the wood beneath your plaster.
- Regular Inspections: Periodic checks can help identify minor cracks or blemishes before they evolve into more significant problems.
- Use Interior Sealants: Applying sealants designed for interiors can create an additional protective layer, enhancing both aesthetics and longevity.
Conclusion
In conclusion, plastering over wood is not merely an exercise in skill but rather a nuanced art that melds preparation, technique, and maintenance. By understanding the intricacies involved and employing the techniques discussed, can yield results that are not only visually appealing but also durable. This venture, whilst fraught with potential pitfalls, promises a rewarding transformation of your living space, allowing you to embrace new possibilities and aesthetics in your home. So, the answer is a resounding ‘yes’ — with the right preparation and techniques, you can indeed lay plaster over wood and achieve remarkable results.
FAQ
Can you plaster over untreated wood?
It is not recommended to plaster over untreated wood as it may not provide adequate adhesion.
What type of plaster should be used for wood?
A lightweight plaster mix is advisable for applications over wood to reduce cracking.

Leave a Reply