Short Answer
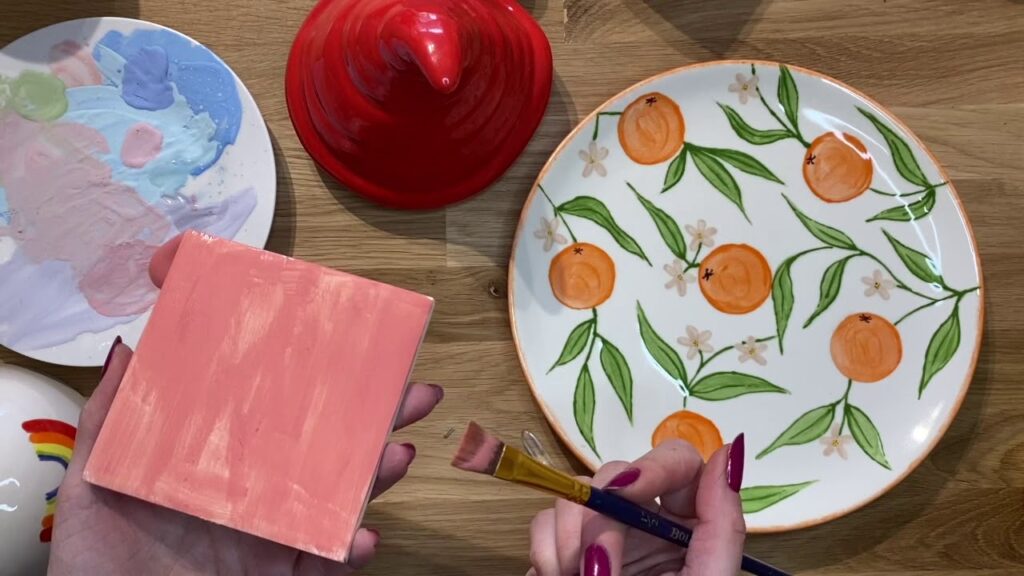
Pottery painting at home is an invigorating and creative pursuit that invites individuals of all skill levels to engage in artistic expression. Whether you are a budding hobbyist or seeking a new way to unwind, gathering a few essential supplies can transform a mundane afternoon into a vibrant session of colours, patterns, and imagination. This article provides an extensive guide for beginners, detailing the necessary supplies, techniques, and valuable tips to help you embark on your pottery painting adventure.
1. Selecting Your Pottery
Before diving headfirst into the realm of colours, it is crucial to choose the right pottery pieces for your artistic endeavours. Ceramics come in various forms, such as plates, mugs, figurines, and flower pots. As a beginner, opting for bisque-fired pottery—pieces that have been fired once but are unglazed—will allow you to paint freely without the worry of damaging a delicate surface. Visit a local craft store or an online retailer to explore options; many shops offer starter kits that include a selection of pottery items tailored for beginners.
2. Essential Painting Supplies
Once you have selected your pottery, it’s time to gather the fundamental painting supplies. Below is a list of indispensable tools and materials:
- Acrylic Paints: Water-based acrylic paints are a popular choice for pottery painting due to their vibrant hues and ease of use. Look for paints specifically formulated for ceramics, as these will offer better adhesion and durability.
- A variety of brushes, including fine-tipped for intricate details and broader brushes for sweeping strokes, will provide versatility in your painting process.
- Palettes: A simple palette allows you to mix colours and experiment with different shades before applying them to your pottery.
- Sealants: Once your masterpiece is complete, a sealant will protect your artwork from chips and scratches. Choose a food-safe sealant if your pottery will be used for food or drink.
- Water and Rags: Always have a container of water on hand to rinse your brushes and a few rags or paper towels to clean up any spills.
3. Preparing to Paint
Preparation is key to a successful painting session. Start by cleaning your pottery with soap and water to eliminate any dust or residues. After drying the piece thoroughly, set up a dedicated workspace with adequate lighting to allow you to focus on the minutiae of your design. Lay down a protective covering on your work surface, as paint can be quite unforgiving to surfaces.
4. Design Inspiration
As creativity flourishes, you may find yourself in need of inspiration. Consider the following sources to spark your imagination:
- Nature: Flowers, leaves, and landscapes can provide beautiful motifs that are both vibrant and peaceful.
- Patterns and Textures: Geometric shapes, polka dots, or stripes can lend sophistication to your pieces.
- Seasonal Themes: Incorporate elements tied to the current season, such as autumn leaves, snowy scenes in winter, or tropical motifs in summer.
Sketching a rough design on paper before committing to your pottery provides a roadmap for your creativity. Transfer this design onto your pottery lightly with a pencil or fine brush, ensuring you can paint over any initial marks.
5. Painting Techniques
With your supplies at hand and inspiration in mind, delve into some fundamental painting techniques:
- Base Coating: Begin with a uniform coat of paint on your pottery to enhance the vibrancy of your design. Let it dry completely before adding additional layers.
- Stippling: This technique involves using stippling motions to create a textured effect. Dab a brush loaded with paint onto the surface, achieving a dimensional appearance.
- Washing: For a more translucent effect, dilute your paint with water to create a wash. Apply this mixture to achieve a soft, layered appearance.
Experiment with these techniques, allowing the paint to inspire new ideas as you work. Remember that imperfections can contribute to the charm of handmade pottery. Embrace the unexpected!
6. Curing and Sealing
After your masterpiece has dried, it is vital to cure and seal it properly. Follow the manufacturer’s instructions for drying times, as these can vary based on the paints used. Once cured, apply a sealant to enhance durability and protect from wear. If applicable, consider finishing with a clear glaze for a glossy finish that elevates your creation.
7. Showcasing Your Art
Finally, display your painted pottery with pride. Consider creating a special corner in your home dedicated to showcasing your art, or gifting pieces to loved ones. Recognising the effort and creativity you’ve poured into your work brings immense satisfaction and encourages an ongoing journey of discovery in the realm of pottery painting.
Engaging in pottery painting at home allows for both relaxation and artistic exploration. With the right supplies and techniques at your disposal, anyone can embark on this delightful hobby, inspiring creativity while cultivating a unique collection of personalised pottery. Let your imagination run wild, and happy painting!
FAQ
What is bisque-fired pottery?
Bisque-fired pottery refers to ceramic pieces that have been fired once without glaze, providing a porous surface ideal for painting.
What types of paints are best for pottery painting?
Water-based acrylic paints formulated specifically for ceramics are best as they offer vibrant colors and good adhesion.
Can beginners paint any type of pottery?
Beginners should start with bisque-fired, unglazed pottery as it is easier to paint and less fragile.
Where can I buy pottery painting supplies?
Local craft stores and online retailers often offer starter kits and individual supplies tailored for pottery painting.




Leave a Reply