Short Answer
The world of hair extensions can be akin to a vibrant tapestry, intricately woven with strands that reflect a myriad of styles and personalities. However, like any fine creation, these extensions require meticulous care to maintain their allure and luster. In this step-by-step guide, we will delve into the art of washing hair extensions, a task that, when performed with precision, ensures that your mane remains radiant and transformative.
Before embarking on this cleansing journey, it is crucial to understand the materials from which your extensions are crafted. Many extensions are made of human hair or synthetic alternatives, each requiring distinct methods of maintenance. Nevertheless, the overarching principles of cleansing remain universal. Just as a master painter tends to their brushes to achieve the perfect stroke, so too must you care for your extensions to prolong their life and beauty.
Step 1: Assemble Your Supplies
Preparation is paramount. Gather the requisite tools and products that will serve as your allies in this essential quest. You’ll need:
- Mild Shampoo: Opt for a sulphate-free and paraben-free shampoo to ensure gentle cleansing without stripping natural oils.
- Conditioner: A high-quality conditioner, enriched with moisturising ingredients, will work wonders in replenishing lost hydration.
- A Wide-Tooth Comb: This will help detangle the strands without causing undue stress or breakage.
- Towels: Use a soft, absorbent towel to gently blot excess moisture.
- A Shower Cap: For those lengthy extensions, a shower cap can keep them contained as you cleanse your natural hair.
Step 2: Detangle Gently
Detangling is akin to untangling a nest of intricate threads—patience and technique are key. Begin by securing your extensions on a mannequin head or a clean surface. Using your wide-tooth comb, start from the tips, working your way up to the roots. This method helps to coax out knots without aggression, much like coaxing a timid bird from its perch. Take your time—rush this step, and you risk the strands becoming frail and weakened.
Step 3: Prepare for the Wash
Fill a basin with lukewarm water, ensuring it is neither too hot nor too cold. Think of this basin as a serene oasis, a welcoming sanctuary for your extension strands. Gently immerse the extensions into the water, allowing them to soak momentarily. This pre-wash phase enables dirt and oil to loosen their hold, setting the stage for a thorough cleanse.
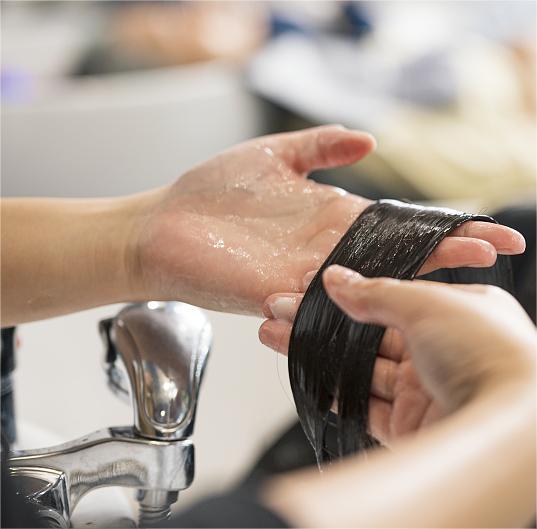
Step 4: Lather Up
With care, dispense a small amount of your mild shampoo into your palms, lathering it gently. Rather than scrubbing vigorously, use a tender, massaging motion as you apply the shampoo to the extensions. This method mimics the nurturing touch of a mother soothing her child. Allow the shampoo to work its magic, breaking down impurities without overwhelming the delicate strands. Rinse thoroughly, ensuring that no product remains to leave behind an undesirable residue.
Step 5: Condition Profoundly
After rinsing the shampoo away, it’s time to indulge your hair extensions in a deep conditioning treatment. Apply a generous amount of conditioner, focusing on the mid-lengths to the ends. The roots do not require as much attention, as they can become greasy. Think of conditioning as wrapping the extensions in a luxurious shawl, restoring their health and vibrancy. Allow the conditioner to sit for a few minutes, providing a much-needed moisture infusion.
Step 6: Rinse and Rejoice
Once the conditioning treatment has been allowed to work its wonders, rinse the extensions in lukewarm water once more. This action washes away the conditioner, leaving the strands soft and manageable. Picture each droplet cascading down, taking with it any lingering remnants of chlorine, oil, or product build-up. Your extensions should now feel renewed, akin to a freshly bloomed flower basking in sunlight.
Step 7: Drying with Diligence
As you prepare to dry your extensions, treat them with the utmost reverence. Avoid wringing them out forcefully; instead, gently squeeze the water from the strands, much like a fine artist carefully removing excess paint from their brush. Lay the extensions flat on a clean towel and wrap it gently to absorb additional moisture. Do not hang your extensions to dry; instead, allow them to air dry on a flat surface, ensuring they maintain their shape and integrity.
Step 8: Final Touches
Once dry, your extensions are now ready for styling! Reintroduce them to your beauty regime with a heat protectant spray if you intend to use heated tools. Employ a soft bristle brush, treating each stroke as a gentle caress. This final touch transforms your hair extensions from mere strands to an undeniable statement of elegance.
Conclusion: The Art of Preservation
Washing hair extensions may seem like a simple chore, but it is a ritual that underscores the art of preservation. By following this detailed guide, you are not only maintaining the beauty of your extensions but also enhancing their lifespan. Just as a gardener nurtures each plant with care, your attention to detail will yield a flourishing crown of lustrous locks that continually capture admiration. When done thoughtfully, each wash brings your extensions one step closer to their potential of becoming a stunning reflection of your identity, woven seamlessly into the fabric of your personal style.
FAQ
How often should I wash hair extensions?
Hair extensions should typically be washed every 10 to 15 wears or when they accumulate product buildup or dirt, but this depends on the type of extension and usage.
Can I use regular shampoo on hair extensions?
It is best to use a mild, sulfate-free and paraben-free shampoo to avoid stripping the extensions of moisture and causing damage.
How do I dry hair extensions without damaging them?
Gently squeeze out excess water without wringing, blot with a soft towel, and air dry flat on a surface. Avoid hanging or using high heat directly.
Are synthetic hair extensions washed the same way as human hair extensions?
Synthetic extensions require gentler care and specific products designed for synthetic fibers, but the general principles of gentle washing and conditioning apply.


Leave a Reply