Short Answer
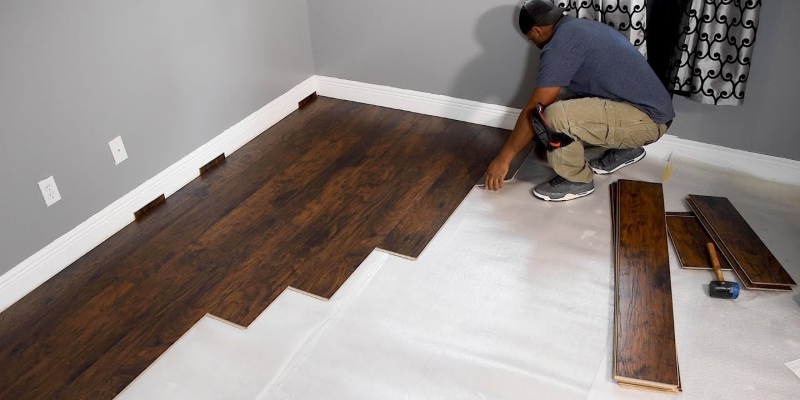
Have you ever looked at your laminate flooring and thought, “Isn’t it time for a change?” The prospect of embarking on a new flooring journey can be invigorating, yet the notion of removing the existing laminate flooring often poses a delightful conundrum: How do you do it without causing damage to your subfloor or the surrounding areas? Fear not! This guide will lead you through the meticulous process of removing laminate flooring, ensuring you navigate potential obstacles with aplomb.
First and foremost, preparation is paramount. Gather all your necessary materials before diving into the task. You will require:
- Utility knife
- Floor scraper or chisel
- Crowbar
- Hammer
- Protective eyewear and gloves
- Measuring tape
- Plastic sheeting (to protect adjacent areas)
With your arsenal of tools at the ready, let’s embark on this flooring adventure. The first step is to clear the room of furniture and any obstacles that might impede your progress. Be sure to remove any baseboards or moulding that might hinder the laminate’s extraction. This is your chance to create a blank canvas, allowing for uninhibited access to the flooring.
Once your workspace is prepped, inspect the laminate itself. Take note of how the planks are installed. Are they glued down or installed as a floating floor? Understanding the installation method will dictate your approach. If it’s a floating floor, the removal process is somewhat simpler; if glued, it may require more persistence and finesse.
To commence the removal, take your utility knife and carefully cut along the seams of the first laminate plank. This helps to break the bond between the planks and any adhesive that may have been used. It’s reminiscent of carefully detangling a knotted necklace—patience is vital.
Once you’ve sliced through the seams of the first plank, gently lift one end. Use a chisel or floor scraper to pry the plank away from the subfloor. If done correctly, it should disengage with relative ease. Should you encounter resistance, it’s prudent to reassess—you may have overlooked a stray nail or adhesive point. In this scenario, muster your determination and continue your efforts with careful attention.
The next phase involves a systematic approach to removing adjacent planks. In a floating floor setup, once one plank is out, the subsequent pieces should follow suit with minimal effort. However, if your laminate is glued, the removal will be less straightforward. Should this be the case, remember the crowbar; it will be instrumental in your efforts to lift stubborn planks. Apply leverage, ensuring the crowbar is consistently angled to prevent damage to the subfloor.
As you progress, be mindful of the laminate type. There are various grades: some are durable while others can easily splinter. Monitor the integrity of the planks you remove; if they are still significant, consider saving them for future projects or repairs. This way, you can breathe new life into your space without an unnecessary expenditure.
Upon reaching the room’s final corner, your excitement may begin to mingle with fatigue. Yet, the end is nigh! If you’re dealing with glue, there will be remnants left on the subfloor. Preventing a meticulous cleanup would be akin to leaving the cake in the oven—an oversight that may cost you dearly later. Use your floor scraper aggressively yet delicately, ensuring all residue is eradicated.
Post-removal, a thorough inspection of the subfloor is essential. Check for any signs of moisture, rot, or other forms of disrepair. Such imperfections can lead to further complications down the road, especially if you plan to lay new flooring. If problems are discovered, resolve them before proceeding; fixing an underlying issue is infinitely more manageable now than after the new installation.
Now that you have successfully removed your laminate flooring, stand back and admire your handiwork. You’ve conquered an intricate task with skill and perseverance. To cap it all off, consider providing a little extra care to your surroundings. Ensure the room is ventilated to eliminate dust and debris, setting the stage for your future flooring aspirations.
In summary, the demolition of laminate flooring may initially seem daunting. Yet, with the right tools, a thorough plan, and a touch of tenacity, anyone can navigate this challenge with success. Each painstaking step from preparation to removal is a stride towards a new aesthetic for your home. Could it be that your ambition to install a fresh type of flooring will become the new pride and joy of your living space? Only time will tell, but your new journey awaits!
FAQ
What tools do I need to remove laminate flooring?
You will need a utility knife, floor scraper or chisel, crowbar, hammer, protective eyewear and gloves, measuring tape, and plastic sheeting.
How do I know if my laminate flooring is glued down or floating?
Inspect the installation method; floating floors can be removed more easily, while glued floors may require more effort.
What should I do if I encounter resistance when removing the planks?
Reassess the area for stray nails or adhesive points and use a crowbar for leverage if necessary.


Leave a Reply